Connect Azure DevOps
One connector reads one Azure DevOps organisation: the projects you select in it, their repositories, and their Azure Pipelines builds.
Heplon can prove who it is in three ways. Pick one before you start. The Add connector form shows only the ways your deployment enables, and the way you pick stays fixed for the life of that connector.
Both application ways need no token to create, rotate, or replace when it expires. Neither one exchanges a secret with Heplon.
Start: open the Azure DevOps form
Every way begins here.
In Heplon, open Connectors.
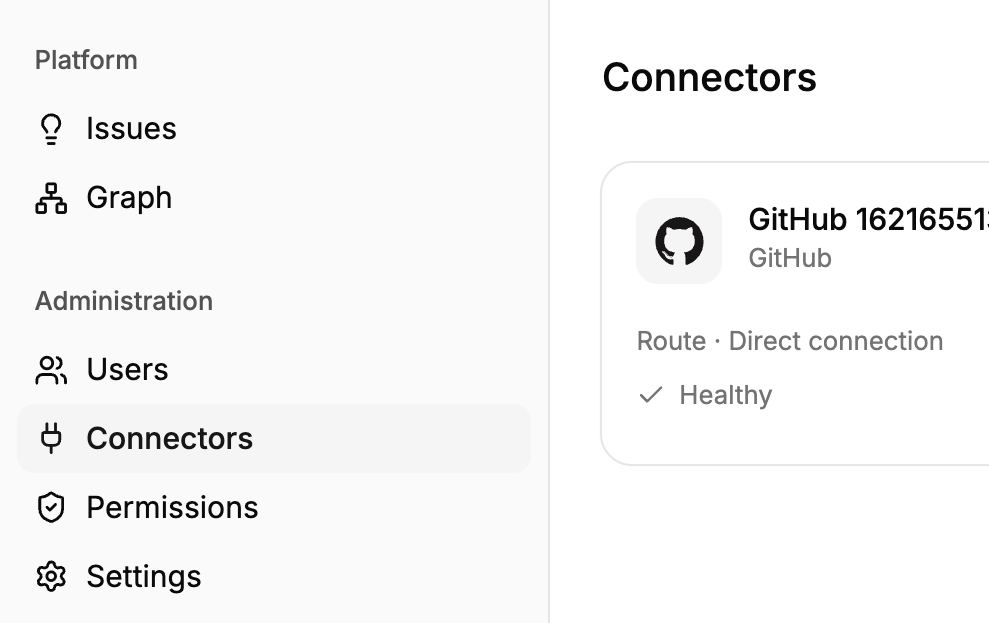
Select Add connector, in the top right.

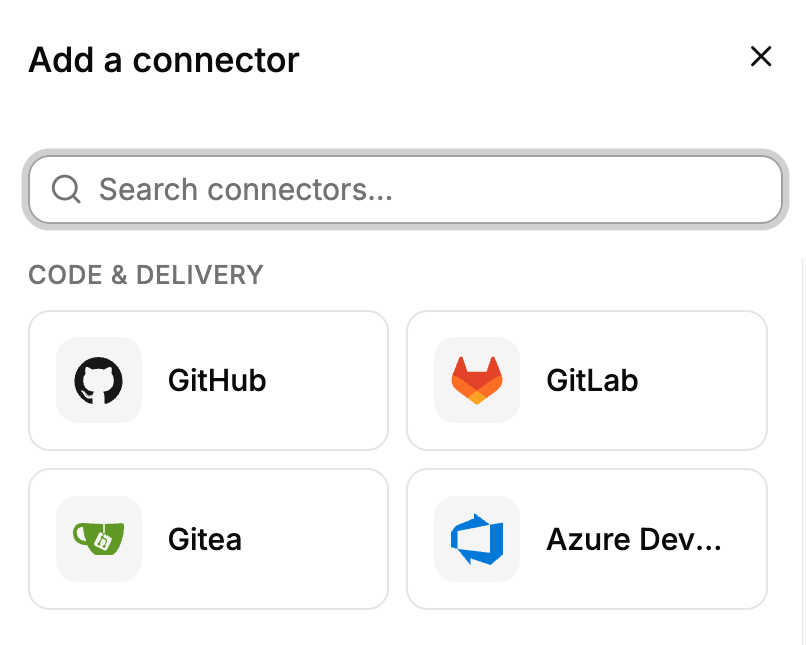
Select Azure DevOps.
Fill in the two fields every way needs.
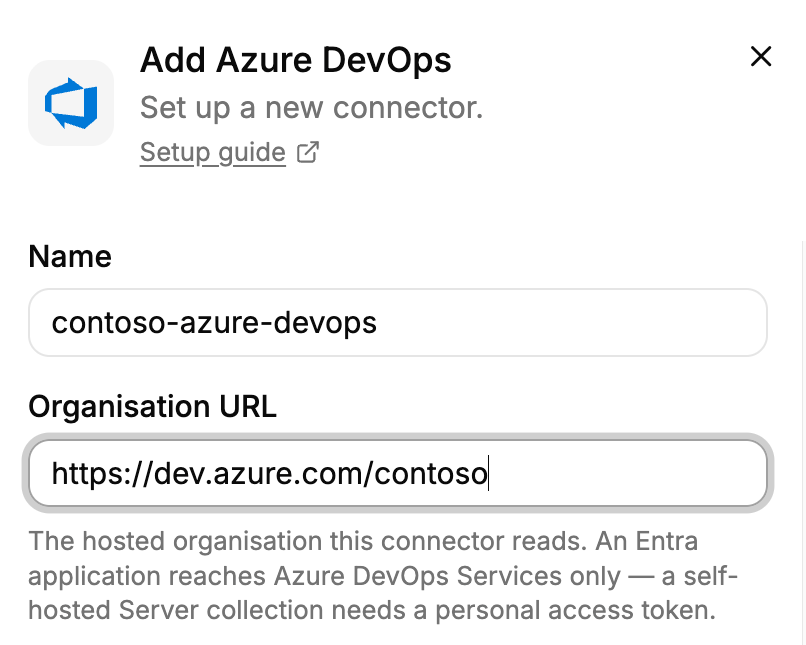
Keep this panel open and continue with your way below.
Way 1: personal access token
You need an Azure DevOps account that can see the projects you want Heplon to read. Heplon reads exactly what this account can reach.
1. Create the token
In Azure DevOps, open User settings (next to your avatar) and select Personal access tokens under Security.
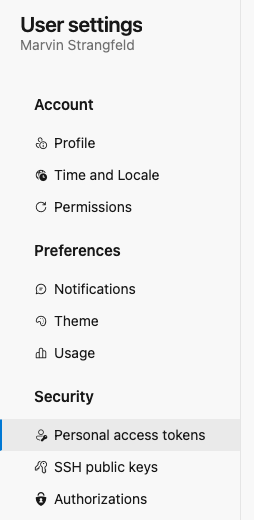
Select New Token and fill in the panel.
Tick exactly two boxes:
- Code:
Read - Build:
Read
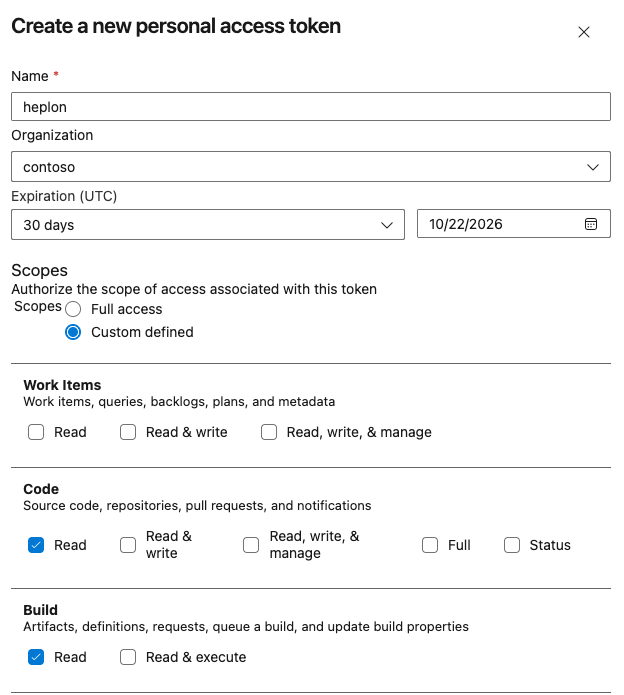
Select Create and copy the token. Azure DevOps shows it once.
2. Paste it into Heplon
Back in the Heplon panel, select Personal access token and paste the token into Access token.
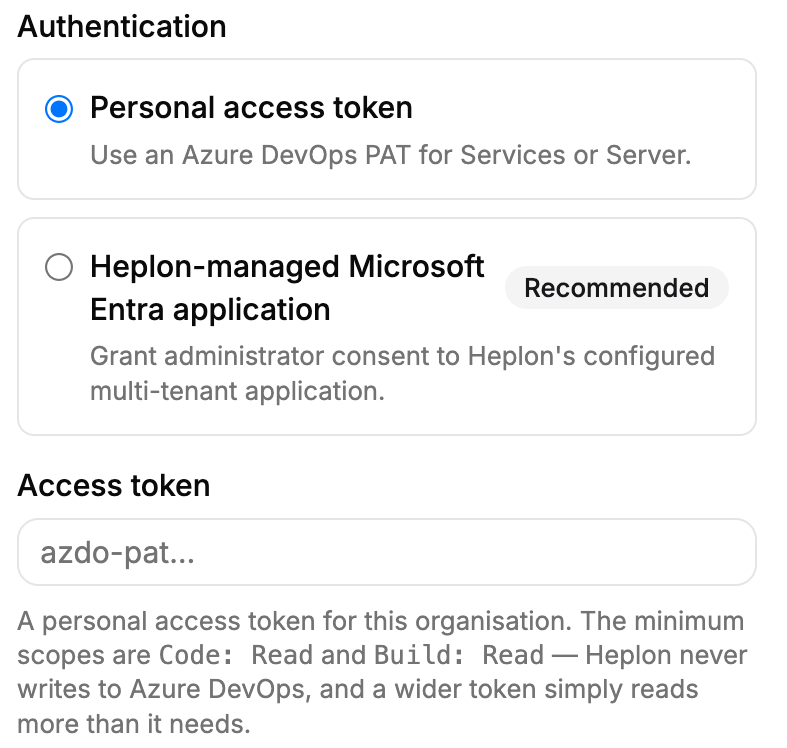
3. Test and save
Select Test connection. Heplon calls Azure DevOps with the token and reports whether it reaches the organisation. Nothing is stored yet.
Save the connector. Azure DevOps is now connected to Heplon.
Way 2: Heplon's Entra application
This way adds Heplon's own Microsoft Entra application to your tenant and gives it access to your Azure DevOps organisation. Heplon owns the application. You own the consent, and withdrawing it revokes access.
You need two roles:
- Entra: Privileged Role Administrator or Global Administrator.
- Azure DevOps: Project Collection Administrator of the organisation.
1. Grant administrator consent
In the Heplon panel, select Heplon-managed Microsoft Entra application. The panel shows the application (client) ID your deployment uses and a Grant administrator consent link.
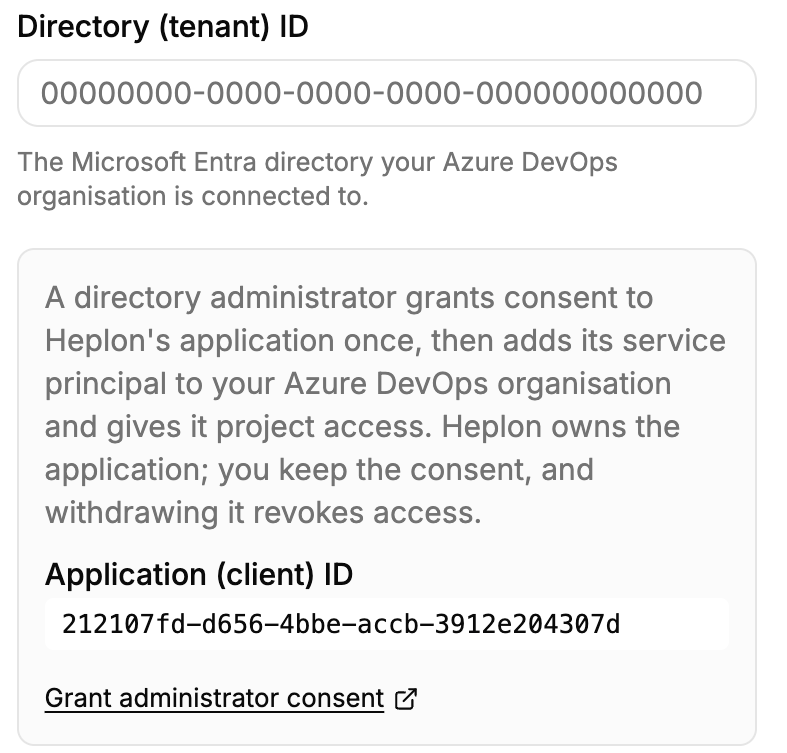
Open that link and sign in as a tenant administrator. Select Accept.
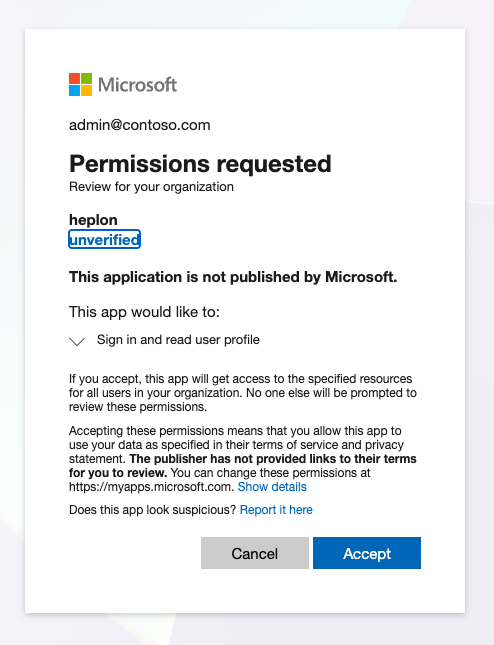
This creates a service principal named heplon in your tenant. The consent
covers sign-in only. It grants no access to your repositories. Step 2 does that.
2. Add the service principal to your organisation
In Azure DevOps, open Organization settings → Users → Add users.
In Users or Service Principals, type heplon. Select the entry whose ID
matches the application (client) ID shown in the Heplon panel.
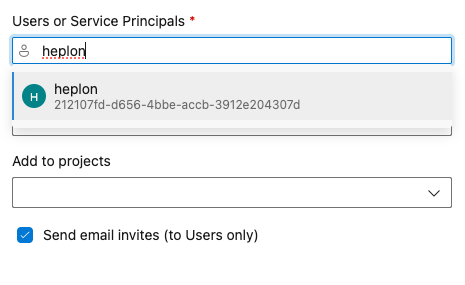
Fill in the remaining fields.
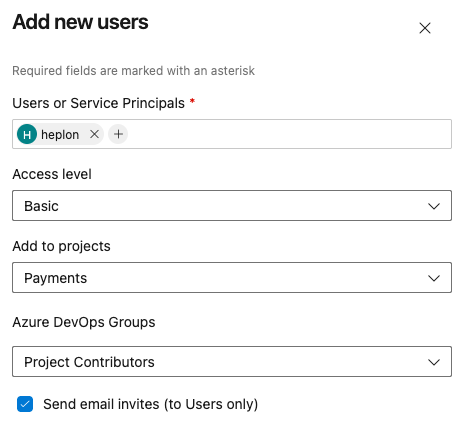
Select Add.
3. Test, select projects, and save
Back in the Heplon panel, fill in Directory (tenant) ID: the Entra directory your organisation is connected to.
Select Test connection. Heplon authenticates, then lists the projects the service principal can read. Nothing is stored yet.
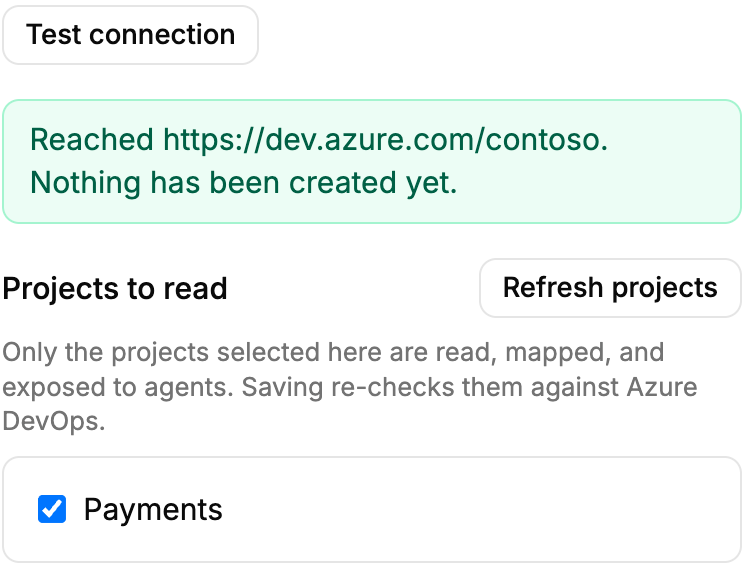
Select at least one project and save. Heplon verifies the identity and every selected project again before it writes the connector, so a revocation between the check and the save is caught.
Azure DevOps is now connected to Heplon.
Way 3: your own Entra application
This way creates a single-tenant Microsoft Entra application in your directory and lets Heplon authenticate as it. The application, its federated credential, and its Azure DevOps membership stay yours, so you can inspect and revoke them without involving Heplon.
Heplon never asks for a client secret or a certificate, and cannot use one. It proves who it is with a short-lived token signed by your Heplon deployment.
Prerequisites: you need to log into Entra & Azure DevOps and have these roles:
- Entra: Application Administrator or Global Administrator.
- Azure DevOps: Project Collection Administrator of the organisation.
1. Copy the three values from Heplon
In the Heplon panel, select Customer-managed Microsoft Entra application.
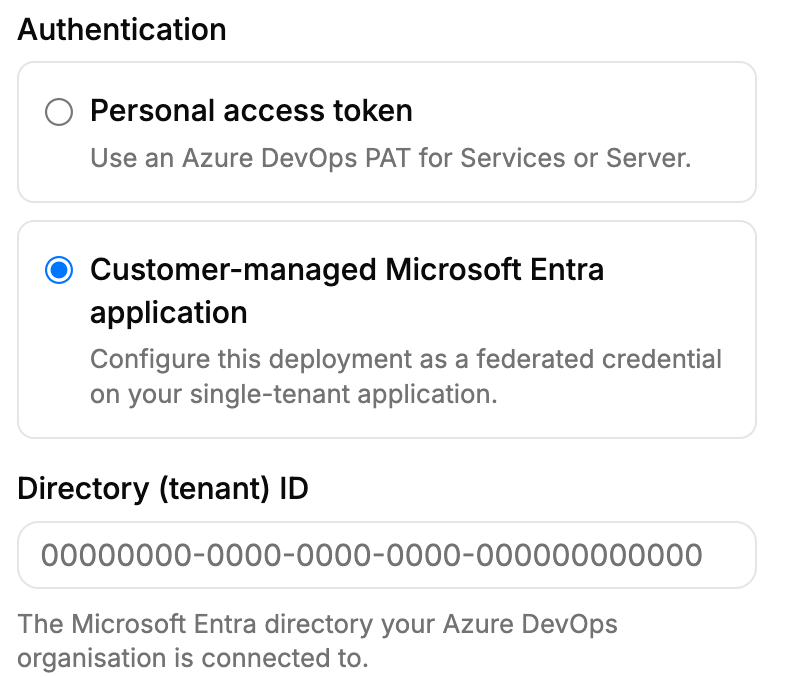
The panel now shows an Issuer, a Subject identifier, and an Audience, each with a copy button. They belong to your Heplon deployment. Copy them from this screen.
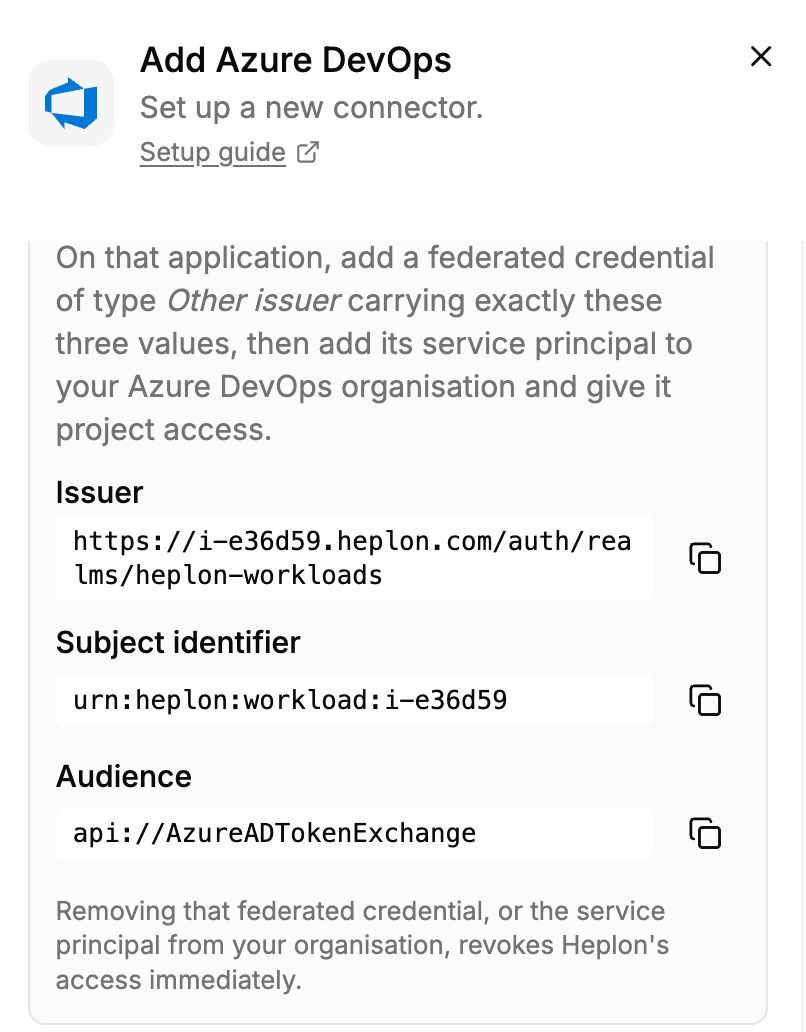
Keep the panel open.
2. Register the application
In the Azure portal, open Microsoft Entra ID → App registrations → New registration.
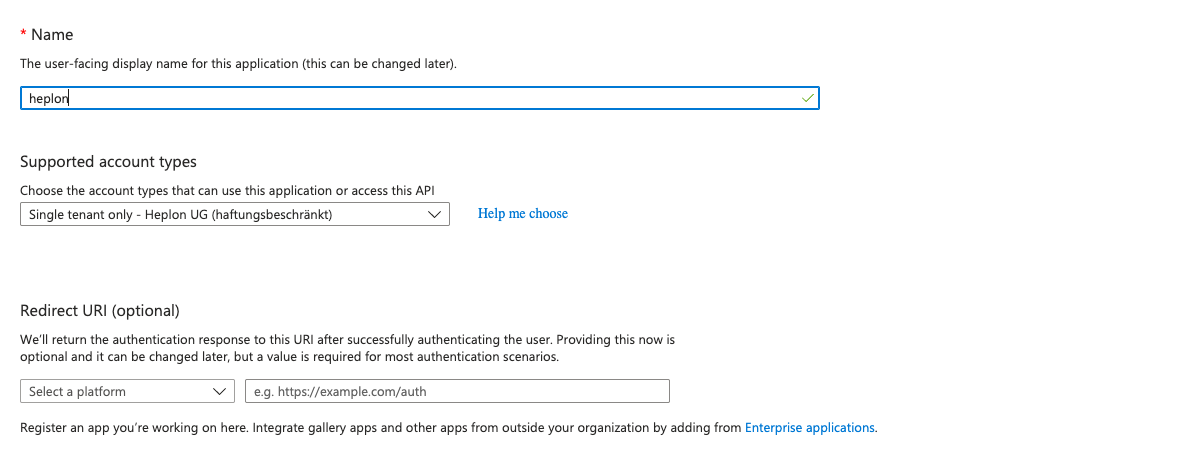
Select Register. The overview page then shows the two IDs the Heplon panel asks for. Copy the Application (client) ID and the Directory (tenant) ID.

3. Add the federated credential
On the new application, open Manage → Certificates & secrets.
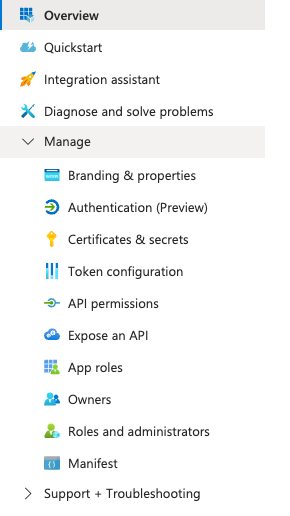
Open the Federated credentials tab and select Add credential.

Set Federated credential scenario to Other issuer.

Fill in the rest:
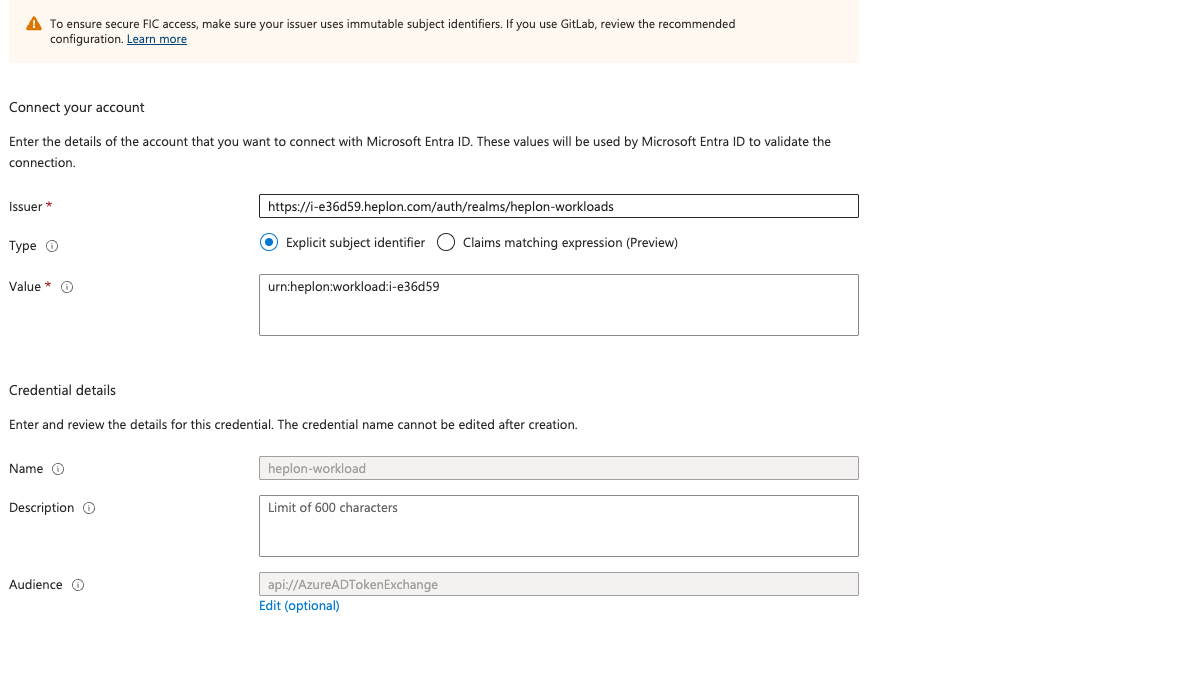
The three values must match exactly, including scheme, trailing characters, and case. Entra rejects the token otherwise, and the check in step 5 says so.
Create no client secret and upload no certificate. Heplon has no way to use either.
4. Add the service principal to your organisation
In Azure DevOps, open Organization settings → Users → Add users.
In Users or Service Principals, type the application name. Select the entry whose ID matches the application (client) ID from step 2.
The panel is the one shown in way 2.
Select Add.
5. Test, select projects, and save
Back in the Heplon panel, fill in the two IDs from step 2.
Select Test connection. Heplon exchanges its own token for an Entra token for your application and lists the projects that application can read. Nothing is stored yet.
Select at least one project and save. Heplon verifies the identity and every selected project again before it writes the connector, so a revocation between the check and the save is caught.
Azure DevOps is now connected to Heplon.